leftHOMEABOUTFABRICPROJECTSIN PRINTtwitterflickrfacebookPinterestright

"Make Something" Archive


Driving Miss Daisy

Wednesday, November 9th, 2011

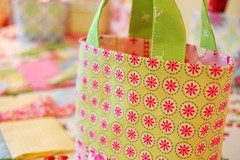
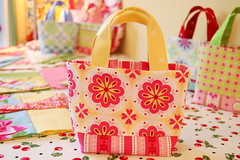
This post has nothing to do with Miss Daisy, or even driving - it just sounded like a good title. And I like saying it. I also like saying Jalalabad (Afghanistan) - but that’s really hard to work into a title. My other title option was Friends with Benefits - but that would give an impression of… hey, not so bad of an impression of me if anyone wants to think that. Truth is, I’m surrounded by kind, fun, amazing and talented friends. Seriously talented.  <name dropping alert>So when Elizabeth asked a bunch of us in our circle-o-friends (aka Sweet Hot Yams) to pattern-test a new pattern of hers (Perfect Zip Bags) - we jumped on it! </name dropping alert>

Elizabeth made us all little kits with fabrics, and zippers, and hardware - all with us in mind.  Elizabeth made my kit with mostly Echino because she knows I love it so.  <name dropping again>I even had some of Mo’s fabric from her Party Dress line (pink and green “pearls”) to add to it!  </name dropping again>
Perfect Zip Bags

I’m not a pattern reader, so this was a new challenge for me. Because I was a Tester - I now HAD to read the instructions.  I was committed. So a funny thing happened on the way to the bar… a priest, a rabbi and a cowboy… all told me to read and I shall learn new things.  And my imagination was right… I learned new things.  An S-load of new things!  Elizabeth’s pattern is so thoughtfully written and her ways of describing techniques are so clear and easy to understand.  I feel so empowered with all that I’ve learned.  And cute bags afterwards - that’s gravy. Now all I can think about doing is adding zippers to everything.
Perfect Zip Bags

Elizabeth has posted photos of all of our bags on her blog.  Not only that - Elizabeth is having a give-away of <more name dropping>Violet’s </more name dropping> Peacock Lane and my Happy Mochi Yum Yum!  Hip, hip, Jalalabad!

Pin It


Christmas Tree Pants Sew-Along - DAY 3 (because not all trees like to wear skirts)

Friday, October 21st, 2011

Please join me today on my third and final day of the Sew,Mama,Sew! Christmas Tree Pants Sew-Along.  If you’re just getting started and need to back-track to the beginning - you can start here, and continue here - and then finish here.

Sew along with me and post your photos each week to the Christmas Tree Pants Sew-Along Flickr group for a chance to win sleigh-load of great goodies from the  Sew,Mama,Sew! Holiday Sew-Along.  Every photo you post in the Tree Pants flickr group is an entry!  All the SMS prize info is at the bottom of my tutorial on SMS.

Day 3 of the sew-along is joining all of our units and finishing our project. My supermodel is the lovely Violet Craft, and we’re in the beautiful backyard of Chez Bedell’s “Sofa n Lunch”.
Sew Mama Sew Christmast Tree Pants Sew-along
Zing… pants!
Sew Mama Sew Christmast Tree Pants Sew-along

I have the final little bundlette of 5″ strips of a Holiday Happy & Happy Mochi Yum Yum combo - waiting to go to good home.
Christmas Tree Pants sew-along

Because this is my final day - I’m adding goodies to the pot.  The nice folks at Wiley Publishing sent me a copy of Better Homes and Gardens Scrappy Quilts to give away to one of my blog readers.  I have two quilt patterns in this book, one of which is from the 2007 Summer issue of Quilts and More (the one on the cover).  Scrappy Quilts is a collection of some of THE MOST AMAZING quilts that have graced the pages of Quilts & More and American Patchwork & Quilting.  This book is a GOLD MINE of goodness, and perfect for any quilter - from the modern quilter to the traditional quilter.  Along with my bundle and the Scrappy Quilts book, I’m including a copy of the 2007 Q&M issue.

Christmas Tree Pants sew-along - Day 3 goodies

Leave me a comment here to enter for this week’s superbundle of bundlette/book/magazine.  If you feel like telling me/everyone what your dream location is to go with friends on a quilt/sewing/crafting retreat to is - please share, it’s so fun and interesting reading everyone’s responses. I’ll announce the superbundle winner next Friday on this post.

Recap:
My teaser and give-away posts here at HZ:  Day 1 | Day 2 | Day 3
Sew-along tutorial posts at Sew,Mama,Sew!:  Day 1 | Day 2 | Day 3
Christmas Tree Pants Sew-along: Flickr

October 28, 2011 Edited in:
Winner, winner! Give-away of the Day 3 Holiday Happy/Happy Mochi Yum Yum bundlette/Book/Mag Super Bundle has now ended. Thank you all for joining in on the give-away! Using random.org for comments 1-234, the winner is: Comment #209 - Toni!

Pin It


Christmas Tree Pants Sew-Along - DAY 2

Friday, October 14th, 2011

Please join me today for Day 2, and next Friday (October  21) for finishing up with Day 3.  If you’re just getting started and need to back-track to my Day 1 - you can start here.

Sew along with me and post your photos each week to the Christmas Tree Pants Sew-Along Flickr group for a chance to win sleigh-load of great goodies from the  Sew,Mama,Sew! Holiday Sew-Along.  Every photo you post in the Tree Pants flickr group is an entry!  All the SMS prize info is at the bottom of my tutorial on SMS.

Day 2 of the sew-along is kind of an easy week - which is kind of relaxing, or a good time to jump in to the sew-along. Though any time is good time to jump in. This week is making 12 sashing strip units.
Christmas Tree Pants sew-along - Day 2

Eight of the strips will have star points on one end.
Christmas Tree Pants sew-along - Day 2

Four of the strips with have star points on both ends.
Christmas Tree Pants sew-along - Day 2

For people makin’ the scrappy version - you get a little extra fun this week… and get to make two 9-patches. Piece of cake, right?!
Christmas Tree Pants sew-along - Day 2

I have another little bundlette of 5″ strips of a Holiday Happy & Happy Mochi Yum Yum combo - waiting to go to good home.  Each Friday of my sew-along I’ll give one away.
Christmas Tree Pants sew-along - Day 1

Leave me a comment here to enter for this week’s bundlette.  If you feel like telling me what your current favorite element or elements (object, shape, etc.) are that you like to see in a fabric is - I’d love to know. I’ll announce the bundlette winner here next Friday - just before I post the teaser post for Day 3 of the Tree Pants sew-along.
Christmas Tree Pants sew-along Day 2

Friends don’t let friends have trees without pants - I hope you’ll join me in the sew-along!

My teaser and give-away posts here at HZ:  Day 1 | Day 2 | Day 3
Sew-along tutorial posts at Sew,Mama,Sew!:  Day 1 | Day 2 | Day 3
Christmas Tree Pants Sew-along: Flickr

October 21, 2011 Edited in:
Winner, winner! Give-away of the Day 2 Holiday Happy/Happy Mochi Yum Yum bundlette has now ended. Thank you all for joining in on the give-away! Using random.org for comments 1-104, the winner is: Comment #84 - Tammy!


Christmas Tree Pants Sew-Along - DAY 1

Friday, October 7th, 2011

Sew,Mama,Sew! Holiday Sew-AlongToday kicks off Day 1 of my Christmas Tree Pants Holiday Sew-Along (because not all trees like to wear skirts) at Sew,Mama,Sew!

Please join me today for Day 1, and the next and following Friday (October 14 & 21) for Day 2 and Day 3 of the sew-along.

Sew along with me and post your photos each week to the Christmas Tree Pants Sew-Along Flickr group for a chance to win sleigh-load of great goodies from the  Sew,Mama,Sew! Holiday Sew-Along.  Every photo you post in the Tree Pants flickr group is an entry!  All the SMS prize info is at the bottom of my tutorial on SMS.  Good times.

Day 1 is making 9-patch stars. Since I’m like my own Hair Club For Men, I’m participating in my sew-along too! The scrappy version.
Christmas Tree Pants sew-along - Day 1

For Day 1 we’ll make seven 9-patch stars. Totally do-able, right? So to make it easy on myself, I got a little mathie so I could get all my ducks scraps in a row. This is my formula:
12) 5″ STRIPS OF FABRIC

From 10 strips, cut:
6) 4½” squares
1) 2½” x 12½” rectangle

From 1 strip, cut:
6) 4½” squares
2) 2½” x 12½” rectangle

From 1 strip, cut:
8) 4½” squares
Christmas Tree Pants sew-along - Day 1

Oh look, I just happen to have 3 little bundlettes of 5″ strips of a Holiday Happy & Happy Mochi Yum Yum combo.  Just lying around, waiting to go to good home.  Each Friday of my sew-along I’ll give one away.
Christmas Tree Pants sew-along - Day 1

Leave me a comment here to enter for this week’s bundlette.  Maybe I can schmooze you into telling me what your current fave 3-color combo is?  I’ll announce the winner here on this post next Friday just before I post the teaser post for Day 2 of the Tree Pants sew-along.
Christmas Tree Pants sew-along - Day 1

Friends don’t let friends have trees without pants - come sew with me!

October 14, 2011 Edited in:
Winner, winner! Give-away of the Day 1 Holiday Happy/Happy Mochi Yum Yum bundlette has now ended. Thank you all for joining in on the give-away! Using random.org for comments 1-186, the winner is: Comment #68 - Karen!

Pin It


Tiny Totes

Saturday, October 1st, 2011

Bernina Fall Bag Contest at allpeoplequilt.com
The Bernina contest on AllPeopleQuilt.com is using my Tiny Totes pattern for the Bernina Fall Bag Contest

UPDATE:
The Bernina contest has ended, but you can get the free Tiny Totes pattern here PLUS some fun modification info here.

Tiny Totes Tiny Totes

Pin It


Scoodie in The Hoodie

Thursday, August 25th, 2011

Today’s the big day… my project day at camp for Lizzy’s 1001 Peeps Summer Camp! This year I’m making a scoodie (scarf + hoodie) to go along with my last year’s Dragon Slayer Satchel. This year my project is Scoodie in The Hoodie - scarf + hoodie all rolled into one, and fabric can be purchased at Sew,Mama,Sew!  Yardage will yield: one adult 12″ or one large kiddie 10″ and one small 8″ or medium 9″ kiddie sized Scoodie’s. Mix and match.
Scoodie in The Hoodie

Yardage:
1 yard outer fabric
1 yard liner fabric
10″ strip for prairie points

1. Cut six 4″ and six 5″ squares for prairie points. For each square, fold over (wrong sides together) diagonally, and press. Fold over diagonally again, and press. 4″ prairie points are for small and medium kiddie Scoodies, and 5″ prairie points are for adult and large kiddie Scoodies.
Scoodie in The Hoodie

2. Lay out your yardage of outer fabric, fold wrong sides together selvedge to selvedge.
Scoodie in The Hoodie

3. Cutting on the length, cut two 12″ units and two 8″ units. Repeat with liner fabric. *For a kiddie medium size, cut your fabrics in 9″ strips, kiddie large size cut in 10″ strips, so on and so forth, and tell two friends and they’ll tell two friends
Scoodie in The Hoodie

4. Pin two 12″ units at an end (to from one long 2 yard strip). Watch your directional print, and pin rooftops at the top. Repeat with liner fabric, and 8″ units.
Scoodie in The Hoodie

5. Place 3 prairie points to each end of the strip, and layer outer and liner units, right sides together with the prairie points tucked neatly inside. Pin.
Scoodie in The Hoodie

6. Leave about a 3″ opening (between red and green pins in photo) for turning about an inch from the center seam, and stitch around all four sides.
Scoodie in The Hoodie

7.
Trim corners off, turn and press.
Scoodie in The Hoodie

8.
Fold unit over in half on center, outer side together. Measure the length of the your center seam, and that will be your side seam’s stitching length to form the hoodie.
Scoodie in The Hoodie

9.
Stitch a ⅛” seam from the hoodie’s tip/pointy part to your marked point. Your stitching will also close your turning opening.
Scoodie in The Hoodie

10.
Go forth and live the scoodie life.
Scoodie in The Hoodie

Pin It


Kiss me Kate - a William and Kate embroidery

Sunday, March 6th, 2011

Somewhere between the Baby Boomers and the Gen X’rs is my group - the Diana Generation.  We cut our hair like Diana (a complete failure for my friz-fro hair), we bought “Sloan Ranger” jackets, we traded in our Levi cords/Ditto jeans, biker shades and Wallaby shoes for preppy pleated pants, wild sweaters and sophisticated loafers.  We coveted any magazine that highlighted our Diana, watched every TV show and news report that featured Diana.   We stayed up into the wee hours of the night to watch her wedding, and recorded the event on VHS tapes - the cherished VHS tape… even though we not longer have VCR’s.   We even had our children around the same time Diana had hers. Diana, our Queen Bee.

As the People’s Princess, Diana was not bound by the United Kingdom’s boarders… Diana was everyone’s princess.  Diana didn’t just bestow us with her style and fashion - she taught us about humanitarianism, benevolence and charity - to take action, to think globally and to be good and active citizens of the world.  She taught us by example and her goodness will live forever. We morn her death so deeply - as if Diana was a close, personal friend.  And as mothers, in our hearts we feel like we became guardians of her children.  And now it’s as if one of our children is getting married.  What a fine young man Prince William is, and what a fine young woman Kate is.   That William is marrying the love of his life… that is just gravy.  William and Kate - our little love birds.

I LOVE royal kitsch. Love it. Put something royal or British on a plate or a dishtowel, add some swirly-ques and exaggerated cursive script… and I’m in. I thought I’d try my hand at making my own William and Kate wedding memorabilia, (because it’s much more fun than a saved VHS tape). I thought I’d share my embroidery with the rest us who didn’t get an invite to the weeding.  We’ll be going to Westminster Abbey via our TV’s and our stitcheries.
Kiss me Kate - a William and Kate embroidery
I don’t know if anyone will even care to make it, but I feel like sharing it. I ironed freezer paper to the back to make it easier to trace with a Micron pen and coloring in the shapes (with everyday Crayola crayons) while atop something tactile to give the tinting some texture.
Kiss me Kate - a William and Kate embroidery
Before stitching (2 strands of floss for entire project, 1 strand for the lettering in the talk bubbles) - I heat-set the coloring with an iron on high and using some cotton muslin to absorb some of the wax (and protect my iron).  I don’t know yet what I’m going to do with my stitchery, but I decided Camille and Bonnie’s Bliss would be the perfect fabric on so many levels to do it in. Though I still don’t know what “it” exactly is yet.
Kiss me Kate - a William and Kate embroidery
If you’d like to make the embroidery, you can download the Kiss me Kate PDF here.  Be sure to set your printer to print at “scale to fit” to print the entire image.
Kiss me Kate - a William and Kate embroidery
If you make the the Kiss me Kate embroidery and/or make something with it, please post your pics to the HZHQ flickr pool.   “Please” as in please-don’t-make-me-beg-you-please post your pics.


Block-a-Palooza - Block 6: You Are Here

Thursday, February 10th, 2011

Welcome to Day 6 of the Bloggers Block-a-Palooza!  This is such a treat for me to be involved in the Block-a-Palooza, and I’ve been having so much fun checking the Block-a-Palooza Flickr pool each day - I love seeing what everyone’s been making - the fabrics, versions and variations.  If you’re not in the pool… dive in!

I made a PDF to download - and am also posting it here in chopped up chunks so you can have two viewing options. I have a preference to quilting instructions - light on the words, heavy on the illustrations… less talky more showy - so that’s what I did.

EDITED IN:
Thank you to everyone who pointed out I had A piece marked as a D (that was a huge copy/paste/ooops of mine). It’s all fixed and I hope it didn’t cause anyone any inconvenience.  I sooo appreciated all those eagle eyes - thank you!

Block-a-Palooza: You Are Here

Block-a-Palooza: You Are Here

Block-a-Palooza: You Are Here

Block-a-Palooza: You Are HereDownload the easier-to-read You Are Here PDF pattern here.  Your eyesight will thank you.  Your printer not so much.

Join and/or view the flickr pool here.  Loads of fun and inspiration in the pool… and not one single Baby Ruth.

Missed the beginning of the Block-a-Palooza?  You can travel back in time to Day 1 / Block 1 by starting here.

Fabric used are from Sunkissed by Sweetwater for Moda.


Fresh Fabric Treats!

Friday, January 21st, 2011

I’m so excited to be participating in the Moda Bakeshop Progressive Dinner celebration… to ring in the new book from Stash Books called Fresh Fabric Treats!  I’m one of the “chefs” in the book - which sounds kinda funny to me since “chef” is what I’d be called if Phoenix froze over. (please don’t remind me that it snowed there this winter)

Almost exactly 2 years ago I wrote a post about this new project called “Moda Bakeshop” I was asked to be a part of… and now almost 2 years to the day I’m writing about the MBS book.  A freaking book!  I would like to think that in 2 years from now I’ll be making a post about the new adventure & theme park called Modaland.  No doubt the Moda genius/superstar/sweetheart Lissa Alexander is right on that!

If this is your first time to my blog, here’s a sampling of my projects at MBS:

my mbs collection

I’m not supposed to talk about or show what I’ve made. Top blahblahblah secret yadayadayada. But no one said I couldn’t go all Perez’y on the back cover.
Fresh Fabric Treats

So now about you! Here’s the deal - goodies for you from Stash and Moda. And good goodies. Hot, steamy good-goodies. Fresh from the oven hot, steamy good-goodies - imaginary hand delivered to you by Fabio from Top Chef. All you have to do is enjoy the progressive dinner tour by:

[1] Leave me a comment on this post, and you’ll be entered to win a copy of Fresh Fabric Treats AND a Moda FAT QUARTER BUNDLE (it’ll be a surprise what fabric you get - something that’s not even available to the public yet!!).

[2] Visit all the chefs on the progressive dinner tour - and leave each one of them a comment on their tour post and you’ll be entered to win $200 worth of Moda pre-cut fabrics and a copy of Fresh Fabric Treats!  HOLY HONEY BUNS, how cool is that.

Progressive Dinner Tour:
January 19
Stash Books
Moda Bake Shop

January 20
Amanda Jean of Crazy Mom Quilts
Roslyn Mirrington of Bloom
Vanessa Christenson of V and Co.

January 21
John Adams of Quilt Dad
Monica Solorio-Snow of Happy Zombie (hey that’s me!)

January 22
Kimberly Walus of Bitty Bits and Pieces
Melissa Mortenson of The Polkadot Chair

January 23
Natalia Bonner of Piece N Quilt
Vickie Eapen of Spun Sugar Quilts

January 24
Rachel Griffith of P.S. I Quilt
Lissa Alexander of Moda Lissa

January 25
Julie Herman of Jaybird Quilts
Sweetwater

January 26
Angela Yosten
Jenny Garland

I’ll be drawing a name for the give-away on my blog on January 28th. Good luck and enjoy the tour!


Square + Square = Magic Hourglass

Monday, January 10th, 2011

I’m sure every quilter has the same kindling and thrill I do - you see a square of fabric and it begs you to transform it into something new.
Double Hourglass 1

So I turned 2 squares into 1 hourglass.  A magic hourglass.  One square of a print, one square of background fabric.  Any size square will work as long as two rules of thumb are followed (more on that ahead).  For my potholder (which is headed to Heather’s new red & aqua rockin’ kitchen), I made four magic hourglasses starting with 5″ squares - and each one finishes at almost it’s original size no matter what the size of square you start with.  All seams are ¼”.
Double Hourglass 2

1) For each print square and background square - cut in half diagonally.  Red fabric by Patty.

2) Cut each triangle in half long-wise.  Rule of thumb #1:  Find your half measurement.  It does not have to be an exact half, but do use the measurement you’ve chosen consistently on all your blocks of that size.  Aqua fabric by Mo.
Double Hourglass 3

3) Trim ⅝” off (and toss) one end of the trapezoid. Rule of thumb #2 - this measurement is etched in stone and is used for every size block.  Charm, Layer Cake… whatever size.
Double Hourglass 4

4) Join a background triangle to print trapezoid/print triangle to background trapezoid to make a triangle unit.  Press to the print. Because you’re working with the motherload of bias edges, press gently with steam.
Double Hourglass 5

5) Audition triangle units - another option beside a double hourglass is to make a square-in-a-square-ish block (how cool is that!).  Red fabric by Bari, aqua fabric by me.
Double Hourglass 6
Double Hourglass 7

6) Join triangle units to make magic hourglass block.
Double Hourglass  8

7) Trim of dog-ears, join blocks and make something.
Double Hourglass 9

And now I will cook something. Hahahahaha - I kill me.
Double Hourglass 10


Farting around with needle & thread and then blogging about it.

Monica Solorio-Snow
Happy Zombie

Pacific Wonderland
Astoria, Oregon

This blog's content, photos and original graphics/artwork are copyrighted. Please do not use, copy, reproduce or distribute. All projects are strictly for personal/non-commercial use only. © 2006-2016

Instagram Twitter Pinterest
bloglovin Flickr I <3 Oregon
I <3 California Vine Facebook


Visit my shop for the
CHICKEN & STARS PDF quilt pattern!
CHICKEN & STARS - PDF quilt pattern

Visit my shop for the
PATIO PDF quilt pattern!
Patio - PDF quilt pattern

Visit my shop for the STRAWBERRY
DELIGHT needlebook template PDF!
STRAWBERRY DELIGHT - needlebook template PDF

Visit my shop for the POOCHIE BAG
PDF sewing pattern!
Poochie Bag - PDF sewing pattern

Visit my shop for the
SPRINKLE PDF quilt pattern!
SPRINKLE - PDF sewing pattern

Visit my shop for the
BADGE HOLDER PDF sewing pattern!
Badge Holder - PDF sewing pattern


HOME
About Me
My Instagram
My Bloglovin
My flickr
My twitter
My Pinterest
happy zombie
My studio
Eating Astoria
My Facebook

my shop
my shop

my instagram
my instagram

my twitter
my twitter

my flickr
my flickr


Sew Yummy!
July August 2014
Cloud9 Fabrics


Winterkist!
Summer 2012
OOP (past info)


happy mochi yum yum by monica solorio-snow
Spring/Summer 2011
OOP (past info)


Holiday Happy - The Fabric
Spring 2010
OOP (past info)


Make happy... make stuff


Published, in print and always in
my mom's shopping cart


Super-categorize me
  • Bake something
  • Bee serious
  • Do Something
  • Fabric Folding
  • Field Trip
  • Happy Mochi Yum Yum
  • Holiday Happy
  • How I Live
  • I Heart California
  • I Heart Oregon
  • La Familia
  • Make Something
  • Mimi Kicks Stash
  • Mimi’s Adventures
  • Quilt Market
  • Quilty n Crafty
  • Rico Swappy
  • Ron Swanson Along
  • Sew Yummy
  • So Stinkin’ Cute
  • Stuff
  • Stuff I like
  • Tiny Totes
  • Tips & Trix
  • Winterkist


  • I'm a girl with a past
  • 2016
  • 2015
  • 2014
  • 2013
  • 2012
  • 2011
  • 2010
  • 2009
  • 2008
  • 2007
  • 2006


  • Make + Share = Inspire
    Happy Zombie HQ
    Holiday Happy Pool
    The Walking Quilted
    Pennie Pocket Pool
    Poochie Bag Pool


    Links


    No, seriously.
    Do Something


    Holy shitballs - I went to QuiltCon


    Blog content, photos and original
    graphic images property of
    Happy Zombie/M. Solorio-Snow
    copyright © 2006 - 2015

    BLOG

    HOME