leftHOMEABOUTFABRICPROJECTSIN PRINTtwitterflickrfacebookPinterestright

"Make Something" Archive


Sewing-time Needlebook

Monday, December 30th, 2013

I’m so excited to post that I have a tutorial and guest-blog post at Liberty of London’s craft blog.  Liberty of London.  That’s so thrilling for me to type, I think I’ll type it a third time.  Liberty of London.  Holy Coke Zero, I’m all Ja’mie-like super crazy excited over that!

I’ve made a really nifty needlebook based off one of my smaller needlebooks. The Liberty needlbook has a real book feel… like a storybook, but for sewests. A story-time needlebook. You can read my guest-post and see my tutorial here.
Sewing-time Needlbook

I used fabrics from Liberty’s Stile collection. Like all of the Liberty fabrics, this one is my fave. This one really is my fave. For real. Until the next Liberty collection comes out.
Sewing-time Needlbook

I made a second sample with fabrics from stash.
Sewing-time Needlbook

And then I got cheeky and decided to mix things up.  My friend Elizabeth has passed on many of her scraps to me, and I lovingly use the Elizascraps when ever I can. I think I think up things to make for the sole purpose of using her yummy scraps.   Note: the center cat fabric is Cocoland Cats by Kokka which I got from Pink Castle Fabrics.
Sewing-time Needlbook

And then there were more, plus the addition of Robert Kaufman Essex Yarn Dyed linen in Steel and in Olive.  I’m mad crushing over these new Essex colors.  I also found some seriously yummy sparlke cotton at my local JoAnn’s.

Sewing-time Needlbook

I got jiggy and tried out some pockets in the pockets. Just a few stitches made on top of D unit and E unit.  I also rounded my “pages” corners. Sewing-time Needlbook

If anyone would like to make the scrappy version, the only thing different than the tutorial is the outer exterior unit.
Sewing-time Needlbook

Sewing-time Needlbook

If you make one, please consider submitting your finished project to my Happy Zombie flickr group, as well as tagging it #sewliberty, @happy_zombie and @libertylifestyle if you post on Instagram, Twitter or Facebook.

RESOURCES:
- Liberty Craft Blog - Needlebook tutorial and guest-post
- Liberty Craft Blog
- Liberty of London
- Liberty Lifestyle Twitter
- Liberty Lifestyle Instagram
- Tag your fabrics and projects with #sewliberty, @happy_zombie and @libertylifestyle


Tiny Kawaii Totes + Giveaway

Tuesday, December 10th, 2013

My ears always perk up when I hear the word kawaii (thank you Gwen Stefani!), and recently my eyes perked up when I read that Pink Castle Fabrics started a Kawaii Fabric Club. Like getting a monthly prescription for a wonderous addiction.
Kawaii

When my bundle of 8 fat eighths came, I had no real plans for the fabric other than for stash building (can I get an amen?). But I did want to use it, too. It’s just to damn cute to put in the cupboard. And then I had the bright idea to make my Small Treat Totes pattern that was in Quilts & More magazine a few years ago.
Tiny Kawaii Tote

I often wonder what it would be like to be that really cool person who bakes trays of cookies or barrels of Chex Mix for the holidays. I’m lucky if I can crank out 5 cookies and a leftover bag of Alaska Airlines snack mix. Perfect to fit in the 2″ x 4″ x 4″ tiny tote.
Tiny Kawaii Tote

The holidays really put me in the gift bag spirit. I just need that spirit to come help me in the kitchen.
Tiny Kawaii Tote

To use a little fabric with big impact, I modified my Treat Totes pattern a little bit, and I used some white solid sparkly cotton fabric from JoAnn’s to complement the kawaii fabric. Here are the cutting measurements for the Tiny Kawaii Tote with solid handles.
Tiny Kawaii Tote
Tiny Kawaii Tote (cutting)

Here are the cutting measurements for the Tiny Kawaii Tote with print handles.
Tiny Kawaii Tote
Tiny Kawaii Tote (cutting)

Assembly instructions are here at AllPeopleQuilt.com.

Pink Castle Fabrics is generously going to give a Kawaii Fabric Club fat eighth bundle to one lucky winner on my blog. Just leave a comment (what would you put in the tiny tote?) by noon ish PST, Saturday Dec. 14th, 2013. I’ll draw one lucky winner via random.org and Brenda at Pink Castle will send you your bounty of kawaii awesomeness.

Edited in: The giveaway has now ended, and using random.org for comments 1-164, the winner is #61 by Darcy from Modern Cozy. Congratulations, Darcy!!


X-crack

Thursday, August 22nd, 2013

Ok, I’m in.
Breaking Bad X-crack
Breaking Bad x-stitch pattern by You Make Me So Happy on Etsy. (Thanks, Amber!)

Since I’m high on the x-stitch crack, thought I’d do a practice run and make my Ron Swanson quilt pattern into an x-stitch.   C’mon, you know you want to x-stitch Ron, too. Right? RIGHT.
Ron Swanson X-crack
I really have no idea what I’m doing.


Heart you, Boston

Thursday, April 25th, 2013

When it feels like the world is falling apart - at the ready are quilters who lovingly want to piece it all back together. It’s what we do. Piecing love and comfort into one scrap of fabric at a time.

The Vancouver Modern Quilt Guild and the Boston Modern Quilt Guild jumped into action and gave us all an opportunity to Do Something. I encourage anyone reading this to hop over and read their blog posts and get involved. Get involved fast, because the deadlines are soon approaching. If you’re a member of a Modern Quilt Guild, check with your guild’s blog if there’s going to be a collection at your May meeting.  To my fellow Portland Modern Quilt Guild members - there will be a collection at our May 16th meeting.

To Boston With Love RESOURCES:

Vancouver MQG: To Boston With Love
VMQG POC: Berene of Happy Sew Lucky
Portland MQG: Bring your flags to May 16th meeting
VMQG: To Boston With Love – tutorials and inspiration
VMQG: To Boston With Love – shipping info
To Boston With Love: Flickr Group

Quilts for Boston RESOURCES:
Quilts for Boston
Boston MQG: Quilts for Boston
BMQG POC: bostonmqg@gmail.com
Quilts for Boston: Flickr Group

Here is my contribution for To Boston With Love:

To Boston With Love
To Boston With Love

I followed the beautiful color palette provided by the VMQG, and because my flag was love from Oregon to Boston - the fabrics I include were from my friends and fellow Oregonians Mo Bedell, Violet Craft, Valori Wells and a few of my own fabrics as well.
To Boston With Love
To Boston With Love

I chose the FurtuaBlack BT font because that’s the font used by the Boston Police.
To Boston With Love

I used my favorite easy appliqué method and the color crayon + embroidery method for my lettering.
To Boston With Love
To Boston With Love
Color 2

I made the long unit version (all the instructions and measurements are on the VMQG blog), stitched up the sides into a pocket, pressed, trimmed off the excess (I made mine longer so I could trim and square it up), and added the binding tie.

To Boston With Love
To Boston With Love
To Boston With Love

I’ve made a little recipe for it in case anyone else wants to make one like ish or like mine.

Make one long unit
To Boston With Love
Printable heart and BOS template (be sure to set your printer to scale at 100%)
To Boston With Love
Measurements and amounts
To Boston With Love

To Boston from PDX with love
To Boston With Love
To Boston With Love

Thank you Vancouver Modern Quilt Guild, Boston Modern Quilt Guild, Berene Campbell, Amy Friend and everyone involved in giving us the gift to be able to give!


Patchwork, Please!

Monday, April 8th, 2013

I’m so giddy over Ayumi’s new Patchwork, Please! book that I eighty-six’d all of my responsibilities and dove right into her yummy book.
Patchwork, Please! Prettified Pincushion

More about Ayumi’s book later on because I’m part of the blog tour starting in June, so I’ll save my sweet-nothings book-love until then.  For now, I hopped on the Zakka Along 2.0 Patchwork, Please! train (do it, too!) as fast as I could and made one of Ayumi’s “Prettified Pincushions”.
Patchwork, Please! Prettified Pincushion

Seriously cute.  As is everything in the book.
Patchwork, Please! Prettified Pincushion

I love all things Ayumi - I love her, I love her patterns, I love her style, I love her kindness, and I love her creativity.  And since I’ve made 9 (and counting) of Ayumi’s lunchbags… I see an s-ton more makings of the Prettified Pincushions in my future as well!
Patchwork, Please! Prettified Pincushion

RESOURCES:
Ayumi Takahashi - Pink Penguin
Buy at:  Amazon
Buy at:  Interweave Store
Join in on the Zakka Along 2.0 Patchwork, Please! flickr group
Zakka Along 2.0 on Threadbias
Zakka Along 2.0 on Facebook


Portland MQG BOM - my Buddy block!

Wednesday, March 20th, 2013

This year the Portland Modern Quilt Guild has introduced a new Block of the Month program for our guild, and this month the PMQG has given me my own very month!

So it turns out the very first issue of Quiltmaker’s 100 Blocks has been reprinted and is available in stores right now.  In that issue is my Buddy block (”Around the Rosie” is what the magazine calls it), and right alongside with Buddy is the block by Pam Vieira-McGinnis of PamKittyMorning!  I say “buddy block” because Pam and I are buddies and we secret squirrel’d our blocks so that they’d go together as companion blocks.  I suspect Quiltmaker caught on to our not-so elaborate scheme since they placed our blocks together (which of course thrilled us!).  I’m sharing my Buddy block for the PMQG’s BOM, but all are welcome to enjoy my instructions.
Buddy block

So back when Pam and I were making our blocks, I was farting around with Pam’s block and my block, using fabrics I didn’t care too much about for playing/experimentation purposes.  Playing with a scrappy look.  Then to discover I liked my results, but not so much for the fabric (which is really pretty, just not something that’s not my taste).  Lesson learned… always fart around with fabrics you love. #lovefarts
Sew Happy Together

For the PMQG BOM I wanted to remake my Buddy block with something new, so I chose Lizzy House’s Pearl Bracelet fabric along with Kona solids.
Buddy

What a perfect pairing! I couldn’t decide on the background fabric, so I took it to Instagram and asked, “Kona white or Essex Yarn Dyed Flax?” Not only did I get an equal response - I got plenty of Essex Yarn Dyed Black suggestions, too.  So I did all three! (thank you IG friends!)
Buddy
Buddy

Buddy block instructions
12″ finished block
Seams are ¼”
Press seams open or press seams to the dark
Buddy block

CUTTING:
Pink
1 - 4½” square (D)

Red
4 - 2⅞” square, cut once diagonally (A1)

Blue
2 - 4⅞” square, cut diagonally once (B1)

White
1 - 5¼” square, cut diagonally twice (A2)
2 - 4⅞” square, cut diagonally once (B2)
4 - 2½” x 4½” rectangles (C)

ASSEMBLY:
Join piece B1 to piece B2 to make a unit. Make 4 units.
Join A1 pieces to A2 to make a flying geese unit. Make 4 units.
Buddy block

Join units into rows. Join rows.
Buddy block
Your buddy block is now done and waiting for a companion block to buddy up with to make a fun 2-block quilt!

Resources:
- Robert Kaufman Fabrics (Kona Solids, Essex Yarn Dyed)
- Andover Fabrics (Pearl Bracelets)
- Lizzy House
- Pam Vieira-McGinnis (PamKittyMorning)
- Portland Modern Quilt Guild
- Quiltmaker 100 Blocks
- Instagram (me!)


Giveaway - it’s raining Modern Quilts from the Blogging Universe!

Tuesday, January 22nd, 2013

My new favorite book is Modern Quilts from the Blogging Universe - a compilation book published by Martingale. I love this book not just because I have a quilt and pattern in it… but because it’s such a great book! Martingale really outdid themselves and put out an aaaaaamazing book. Visually stunning layout, beautiful quilts, great illustrations, amazing bloggers (!!!) and jam & jelly packed with projects.
Modern Quilts from the Blogging Universe

What I love about MQBU is that Martingale chose to just put the projects in the book. Just projects - LOVE that. All the other stuff like binding, sammiching, quilting, etc - has all been left out (and delegated to a URL to their website) to make room for more projects. Genius. Seriously. Genius. That I’m lucky enough to have been included in it, and having gotten to use my Happy Mochi Yum Yum collection… that’s gravy. Crazy, crazy, gravy!

My quilt/project in the book is my Juicy quilt. Juicy because it’s your basic HST/hourglass & flying geese blocks, making it easy to sew up while sewing with friends and being able to keep up with juicy conversations.
Juicy - my quilt in Modern Quilts from the Blogging Universe

Plus I think my quilt blocks look like juicy little nuggets of Starburst candy.
Juicy - my quilt in Modern Quilts from the Blogging Universe

Flashback photos: A mini-Juicy I made with 2½” Kate Spain’s Terrain and Central Park charms (and the charms are extra special since Kate gave them to me!). The mini-Juicy led to the Juicy that’s in the MQBU.
Juicy - mini version of my quilt in Modern Quilts from the Blogging Universe
And if quilts could talk, there would be some juicy stories to tell!
Juicy - mini version of my quilt in Modern Quilts from the Blogging Universe

GIVEAWAY:
Martingale is generously giving an eBook of Modern Quilts from the Blogging Universe to 19 lucky winners! Holy eSmokes! You have 19 chances to win an eBook - leave a comment here for one chance, and then visit the post at Martingale to enter plus get access to the 17 other bloggers.  Curious what’s inside the book - you can peek inside here plus see all the quilts and the bloggers on Martingale’s giveaway ground zero. Leave a comment below by noon-ish PST on Tuesday, January 29th, and I’ll draw one of 19 lucky winners for the MQBU eBook.

Edited in: The giveaway has now ended, and using random.org for comments 1-484, the winner is #122 by Jane of Two Wednesdays. Yay, Jane!!

RESOURCES:
MQBU: Bloggers, projects and contest
MQBU: Book info
Fabrics: Kate Spain (Terrain and Central Park)
Fabrics: Me (Happy Mochi Yum Yum)
Fabrics: Robert Kaufman (Kona solids)
Monster: flashback post


All because of a little hashtag

Tuesday, January 15th, 2013

I’m not sure who started it, but I know for me it was because Katy, Megan and Brenda lit a fire under my butt with their #scappytripalong on Instagram (I’m pretty sure they’re behind all the madness/scrappy crack). I was just minding my business, getting my daily fix o’ pix on my Instagram feed - and the next thing I know I’m up to my eyeballs in 2½” squares.

It’s so funny to go back in time only a few weeks to read Megan’s blog post, where she mentions about 8 other people making the scrappytripalong.  HAHA… It’s more like 800 people now making (or have made) one!  The Flickr group has almost 800 members, and the #scrappytripalong hashtag on Instagram has almost 3000 photos. Talk about a quilt project going viral. Clearly the internet was invented for cats and for quilts.

The magic of the #scrappytripalong is that it’s easy, it’s fun and uses scraps. The instructions can be found via the flickr group or directly here.  The second one inhales the potent hashtag… one is ready to go and start quilting.  A stack of Dear Stella solids I bought last summer at West Seattle Fabric Co. was begging to be scrap’d up.
The #scrappytripalong

I jumped in, peppered my solids with a few prints, and was instantly hooked… and next thing I know I haven’t showered for days.
The #scrappytripalong

I wasn’t using the traditional tube method often used in a Trip Around the World quilt, so I got myself organized with a paper plate trick I learned from Darlene Zimmerman to keep my block pieces tidy and organized.
The #scrappytripalong

I made two blocks. Then four. And then I wanted to eat, sleep and breathe making these blocks.
The #scrappytripalong

Oh look, a squirrel. Ok, so everyone on Instagram was mentioning how fast and fun the tube sewing thing was, so of course I had to try it. I grabbed a Moda honey bun (1½” strips) of American Jane’s Snippets and went on a fact finding mission (<— which sounds way better than having ADD). I joined the rows and lobbed off the first 1½” strip (why join that in a tube if I’m only going to have to un-sew it?!).
The #scrappytripalong

Well that was fun, but I’m curious how long that took me. So I set out to do another block, this time I was going to time it. Seriously, what is wrong with me?
The #scrappytripalong

Maybe I’m watching too much Mythbusters, because I really needed to do some more time tests.
The #scrappytripalong

Crap. Then I had to make a forth one so I could see how they all look together.
The #scrappytripalong

Back to my first attempt. Blocks just waiting to be made. Momma, is that you? Pretty sure I heard them talking. Or maybe it was that I hadn’t slept and showered in days.
The #scrappytripalong

I was two blocks shy of 24 blocks to do a 4×6 setting, and I figured it would be way faster to do some cascading blocks on the top, bottom and sides (like my Farmer’s Wife quilt) vs just making two regular blocks. And it probably took me 10 times as long to do that. Because I’m so smart like that. Time management is not my friend. (in fact she’s a bitch and out to get me)
The #scrappytripalong

Setting my blocks in Kaufman’s Essex Yarn Dyed in Flax (I want to marry that fabric). OMG I’m almost done!
The #scrappytripalong

Last piece to join… OMG I’m so excited I’m done.  And then… OMG I’m so sad that I’m done. SERIOUSLY, what is wrong with me?!
The #scrappytripalong

Top and side
The #scrappytripalong

Bottom and side
The #scrappytripalong

And finito.
The #scrappytripalong

So happy I’m done, but so sad I’m at the #scrappytripalong finish line. But I can’t be too sad for too long - Megan is at it again, this time tempting me with the #xplusalong.

RESOURCES:
Scrappy Trip Along flickr group: flickr.com/groups/scrappytripalong
Instructions/tutorial: quiltville.com/scrappytrips.shtml
Shop: West Seattle Fabric Co.
Essex Yarn Dyed (in flax): Robert Kaufman
Solids: Dear Stella
Honey bun: Moda


Sublime Floss!

Friday, October 19th, 2012

Never ever in the history of nevereverness has there been such a cool, new embroidery floss!  The super cool and brilliant genius (coolest girl in the whole damn school), Jenny Hart of Sublime Stitching unveils her new Sublime Floss embroidery floss today. I was lucky (lucky is an understatement) to be able to take Sublime Floss out for a test spin before today’s big unveiling.
Sublime Floss!

After I parked from the test spin, I confess to wanting to make out with the floss.  That or eat it. Sublime Floss is like candy without the nasty repercussions. Sweet little 7-packs of crazy, sick yumminess.
Sublime Floss!

Organized in perfect little color group packs. I love picking out fabrics for a quilting or sewing project so much, that I think I actually get a buzz.  But with floss, I don’t have brain juju to put colors together.  In my hand a gathered bundle looks amazing and well put together - but once I’ve stitched with it and see it on my fabric… I wonder what the spork I was thinking. Blerg ferg, I suck at auditioning floss. With Sublime Floss I no longer have to think or audition floss, it’s all been done for me. GAH, love it so much. <Arnold Schwarzenegger> Stitchery super powers are now mine! </Arnold Schwarzenegger>
Sublime Floss!

It took everything I had to open the sweet little packages o joy and take out the floss, but thank goodness I did - there were even more sweet surprises inside! OHMYUNIVERSE, the color names are so fun and clever!
Sublime Floss!

And then I saw the little messages at the end of each skein - too cute, too clever, too funny and TOO COOL!!
Sublime Floss!

For my test spin I thought it would be fitting to sample a pattern I had recently bought at Sublime Stitching - a pattern by Carson Ellis on Sublime Stitching’s artist series. I had no idea how much I loved Carson’s work until Sublime Stitching unwittingly feed me nuggets of enlightenment… HEY, that’s the same Carson Ellis who’s illustrations grace the Wildwood books (with her writer husband Colin Meloy of The Decemberists!)  - THE reason I bought the books was because of the cover artwork (and because I got great feedback when I Instagram’d Colin & Carson’s books while I was at Costco, and because the books take place right here in Oregon). AND OH HEY, Carson Ellis is the same artist who’s benefit poster I’ve loved so much for so long.  I was initially drawn to the mention of my little town of Astoria and the Liberty Theater on the poster, and then fell in love with the artwork.   Talk about sublime serendipity!
Sublime Floss + Carson Ellis

Besides loving the colors of Sublime Floss, I love the tightness of the floss (all while retaining it’s soft, buttery feel). I’m a 2-strand stitcher, but often find I have to go to one strand for detailed embroidery work. With this floss I can still use two strands and not loose my detailed stitches in a fat, blubber of floss.  I stitch with long threads because I’m lazy, and this floss really holds up to prolonged stitching time without getting separated, thin, or fuzzy. I love you, floss.
Sublime Floss + Carson Ellis

I don’t know yet what I’m going to do with this любовь (Love) stitchery once I’m done, but I’m just happy to be stitching with my new floss boyfriend.
Yo.
Stitch.

Resources:
sublimestitching.com
sublimefloss.com
carsonellis.com
wildwoodchronicles.com


A bag for all reasons - Book Review & Giveaway!

Tuesday, October 16th, 2012

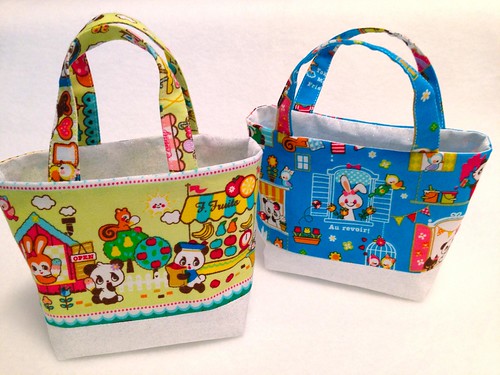
I don’t do a lot of book or product reviews, but when something comes along that I really want - I jump at the offer. When I was offered the Lisa LamA Bag for All Reasons” review opportunity, I admit that I’m SUCH A HUGE FAN OF LISA and U-Handbag that all I *saw* (ala Gary Larson) in the publisher’s email was, “aasdkfjl azdlkjzmrg’ dglkzdk LISA LAM slkdfoc we;r a’d idfoijsodj dkmlk LISA LAM sdkp[ e ald ogpwekr fkjgo LISA LAM slaoi difoijfoiam alfj’a adfkjaldkjg doijcoijoi LISA LAM” and immediately replied, “YES”, and then went back are re-read the email.
3-1 Convertible Backpack

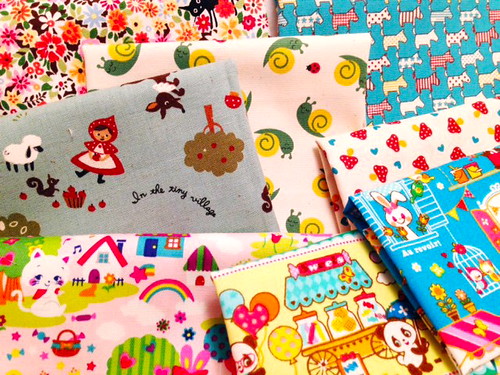
I had seen the 3-1 Convertible Backpack on flickr and KNEW I wanted to make one, too.  My fear was that it would be too advanced of a pattern for my not-too-advanced brain. And because I often don’t read pattern instructions, I knew that since I was doing a review I would have to actually read the instructions. Oh the pressure was so strong, I almost ditched the backpack plans. But I gave it a go and read the instructions the well written instructions!  And then fear quickly turned into a fist pump in the air and a proclamation (to my dogs) that I CAN DO IT! Besides, I already had some Amy Butler Daisy Chain, a teal solid, and some poser linen (a cotton weave) already set out to make the backpack. The sperm had pretty much shook hands with the eggs at this point - and I HAD to get this backpack baby get made.
3-1 Convertible Backpack
OBSERVATIONS:
I’m am a visual, non-reading instruction follower. Lisa’s instructions are well written and in a way that feel like she’s talking to me one-on-one giving me personal instruction.

I took my time and made my bag over the course of 3 days. One step at a time, and no speed-demon-plow-my-way-through sewing.

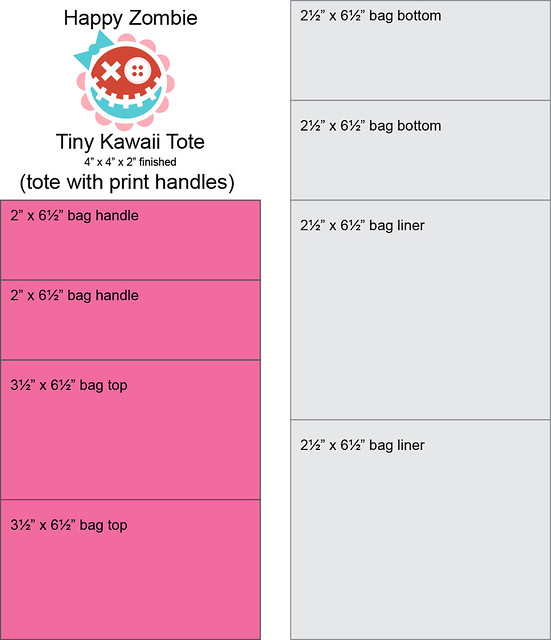
I traced my pattern pieces onto freezer paper, and ironed-on the pieces to my fabrics (no pinning!).

I used cotton duck (available in the “outdoor” fabric section at JoAnn’s) as my interlining. Cotton duck canvas makes for a nice, stiff form with not a lot of bulk. I learned this genius interlining trick at Oh, Fransson! - thank you Elizabeth!
3-1 Convertible Backpack

Another trick I learned from Elizabeth is using Clover’s Wonder Clips in tight, curvy, bulky spaces. These clips are a DREAM to use!
3-1 Convertible Backpack

Permission granted! I love when pattern writers “give permission” to do things your own way (something I encourage on my own patterns). I was already apprehensive enough with all the hooks, loops and snaps (the H Word… hardware) - but the grommets about had me running for the hills since I was doing this step by step and literally by-the-book for this review. In the book Lisa says, “if you have a phobia of eyelets (grommets) don’t let that stop you making this bag - in place of eyelets, make a casing for the top of the bag and thread the ties through this instead”. HOLY GROMMET HOLES, it’s as if Lisa wrote that for me. So I did, I made a casing.  I also made a little flange-ish thing (the technique name excapes me because I just learned that word only a few weeks ago) - the result when you have a little bit of the lining showing.
3-1 Convertible Backpack

I top-stitched a tube around the top with an opening at the front.
3-1 Convertible Backpack

I got one of those squeezy knoby bobs and voila.
3-1 Convertible Backpack

I could not be more happy with my backpack. I can’t put it down and I keep playing with it. I repeatedly tell my two cats and two dogs, “oh yeah, I made this”. I really couldn’t have made this without such well written instructions and Lisa’s crazy awesome designs.
3-1 Convertible Backpack

For now my backpack is a trophy bag - on display and sitting pretty.  Tomorrow we go out, and I show the world (or the 10,000 people of Astoria) my new baby.
3-1 Convertible Backpack
My only dilemma now is deciding to whether to make another backpack or one of the other fabulous projects in the book!

Edited in:
I was told that there has been a printing error with that pattern and that it should have been corrected with the latest batch of books. If anyone should get a previously printed copy, here are the instructions I recieved (that should follow step 26):

Three in one convertable (bblfr)

The bblfr needs to be stitched centrally over the bag flap (on the bag back exterior). The top edge of the bblfr needs to be placed one centimetre above the bottom edge of the bag flap (so the bottom edge of the bag flap this covered by the bblfr). PS the top edge of the bblfr will have the d-rings and grab handle pointing upwards.

RESOURCES:
U-Handbag: u-handbag.com
Digital preview: A Bag for All Reasons
Lisa’s blog: u-handbag.typepad.com

GIVE-AWAY!!
F+W Media is kindly giving away a copy of A Bag for All Reasons to one of my readers! Leave a comment and I’ll draw a lucky name this upcoming Saturday morning.

Edited in: The giveaway has now ended, and using random.org for comments 1-238, the winner is #31 by Pam of Library Gal Quilts (how awesome is it that the library gal won a book!). Yay, Pam!


Farting around with needle & thread and then blogging about it.

Monica Solorio-Snow
Happy Zombie

Pacific Wonderland
Astoria, Oregon

This blog's content, photos and original graphics/artwork are copyrighted. Please do not use, copy, reproduce or distribute. All projects are strictly for personal/non-commercial use only. © 2006-2016

Instagram Twitter Pinterest
bloglovin Flickr I <3 Oregon
I <3 California Vine Facebook


Visit my shop for the
CHICKEN & STARS PDF quilt pattern!
CHICKEN & STARS - PDF quilt pattern

Visit my shop for the
PATIO PDF quilt pattern!
Patio - PDF quilt pattern

Visit my shop for the STRAWBERRY
DELIGHT needlebook template PDF!
STRAWBERRY DELIGHT - needlebook template PDF

Visit my shop for the POOCHIE BAG
PDF sewing pattern!
Poochie Bag - PDF sewing pattern

Visit my shop for the
SPRINKLE PDF quilt pattern!
SPRINKLE - PDF sewing pattern

Visit my shop for the
BADGE HOLDER PDF sewing pattern!
Badge Holder - PDF sewing pattern


HOME
About Me
My Instagram
My Bloglovin
My flickr
My twitter
My Pinterest
happy zombie
My studio
Eating Astoria
My Facebook

my shop
my shop

my instagram
my instagram

my twitter
my twitter

my flickr
my flickr


Sew Yummy!
July August 2014
Cloud9 Fabrics


Winterkist!
Summer 2012
OOP (past info)


happy mochi yum yum by monica solorio-snow
Spring/Summer 2011
OOP (past info)


Holiday Happy - The Fabric
Spring 2010
OOP (past info)


Make happy... make stuff


Published, in print and always in
my mom's shopping cart


Super-categorize me
  • Bake something
  • Bee serious
  • Do Something
  • Fabric Folding
  • Field Trip
  • Happy Mochi Yum Yum
  • Holiday Happy
  • How I Live
  • I Heart California
  • I Heart Oregon
  • La Familia
  • Make Something
  • Mimi Kicks Stash
  • Mimi’s Adventures
  • Quilt Market
  • Quilty n Crafty
  • Rico Swappy
  • Ron Swanson Along
  • Sew Yummy
  • So Stinkin’ Cute
  • Stuff
  • Stuff I like
  • Tiny Totes
  • Tips & Trix
  • Winterkist


  • I'm a girl with a past
  • 2016
  • 2015
  • 2014
  • 2013
  • 2012
  • 2011
  • 2010
  • 2009
  • 2008
  • 2007
  • 2006


  • Make + Share = Inspire
    Happy Zombie HQ
    Holiday Happy Pool
    The Walking Quilted
    Pennie Pocket Pool
    Poochie Bag Pool


    Links


    No, seriously.
    Do Something


    Holy shitballs - I went to QuiltCon


    Blog content, photos and original
    graphic images property of
    Happy Zombie/M. Solorio-Snow
    copyright © 2006 - 2015

    BLOG

    HOME