BLOCK BUDDIES - piecing boards
January 17th, 2016
Years ago I took a quilting class with Darlene Zimmerman, and one of the things I learned from her was a nifty tip to keep your cut block pieces organized before piecing them. The tip so simple and so genius is hurt my brain a little. That tip was to use el-cheapo paper plates for each block to corral each of it’s pieces. And each paper plate could be stacked, too. BRILLIANT. I’ve been using this method for almost a decade now. But suddenly I needed something more - something where I could layout out the block, stack it, and then join the pieces a block at a time without a big mess and confusion. Ideas danced like Elaine Benes in my head with ingredients like Soft & Bright poly bat (by The Warm Company) and corrugated plastic sheeting. And most of all, I didn’t want glue in my little dance. And most, most of all I wanted it to be fast and easy. Sweet Fancy Moses, I’ve got it!
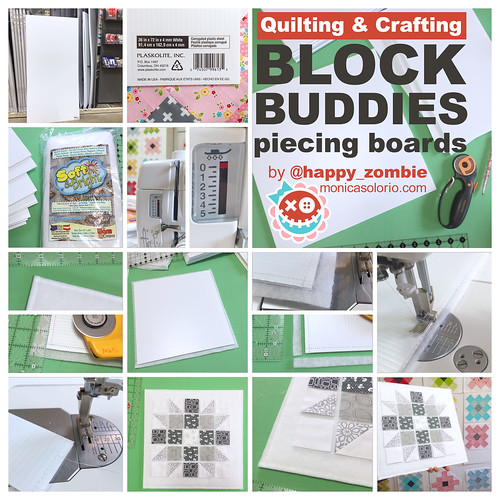
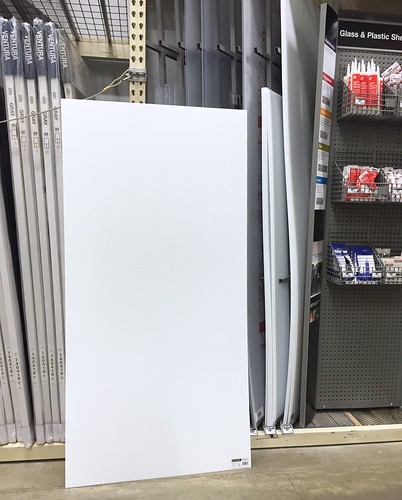
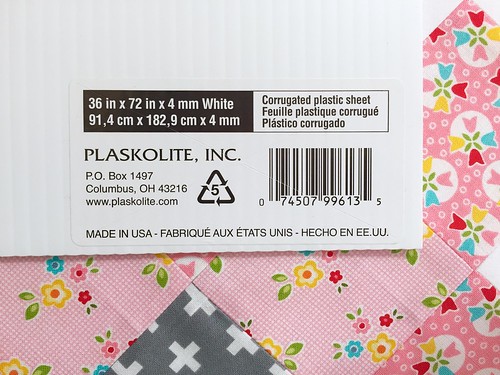
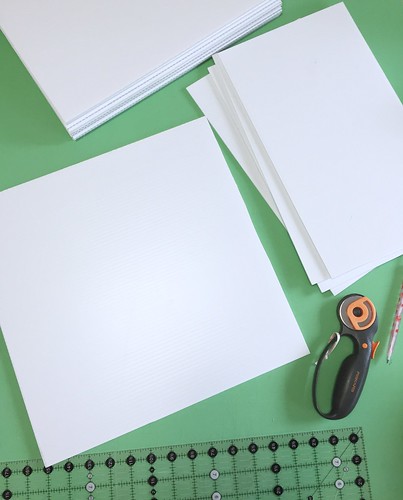
I went to my local big box home improvement store (which BTW is Home Depot and we appreciate immensely the discounts they give to veterans) and found a big 36″ x 72″ sheet of corrugated plastic sheeting for $10.50 USD. I found it near all the flat stuff (acrylic, glass, plastic, etc.). It’s super lightweight, but that doesn’t mean it’s going to be easy to get this piece of sheet (hahaha I crack myself up) home, so I waited until I was shopping with my husband and could pop the sheet in the back of his truck. Getting this home is the most creative part of this project, but is also available on Amazon.
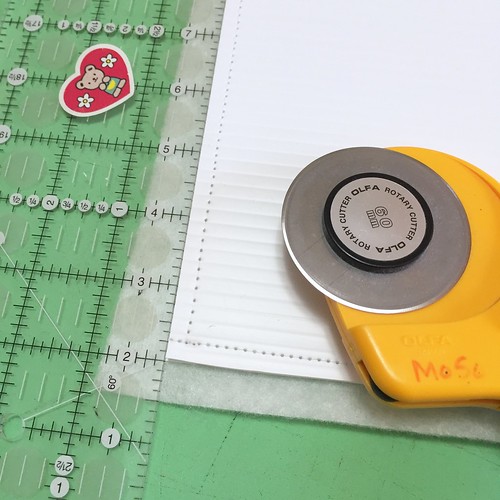
With an old rotary cutter (that’s dedicated for paper and crafting use), I cut the big piece of sheeting into ten 14″ x 14″ pieces. I chose 14″ so I would have room to work on a 12″ finished block. I saved all the leftover small pieces and set them aside. Of course anyone could cut any size they wanted, larger or smaller.
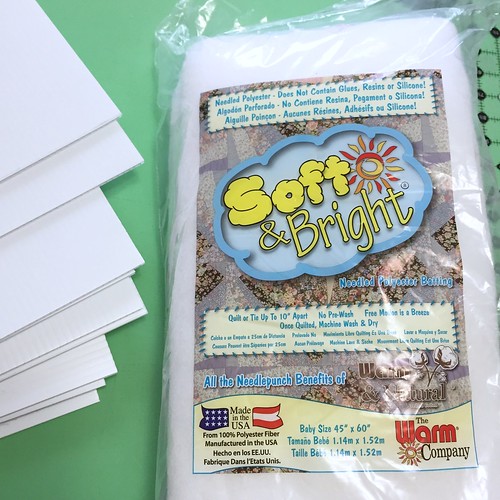
I took a “Baby Size” package of Soft & Bright and cut ten 15″ ish squares - so all sides were larger than my 14″ plastic squares. Soft & Bright also available by-the-yard here.
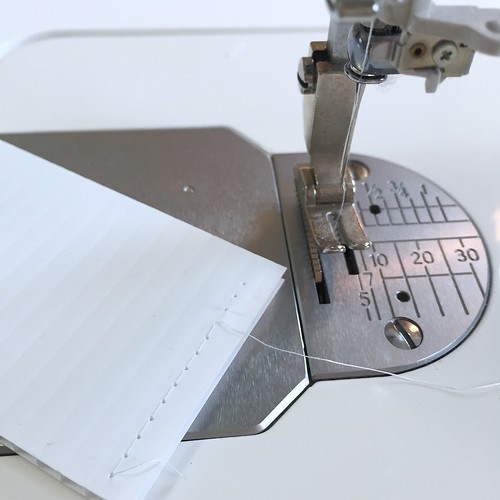
I adjusted my sewing machine’s pressure foot as high as it would go. I also used an old needle (or if you use a current needle, be sure to replace it with a freshie once you’re done).
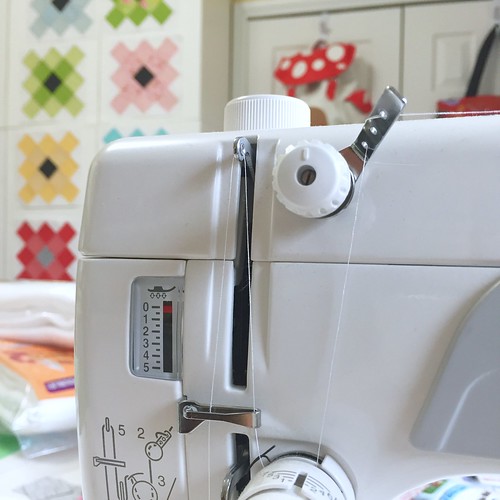
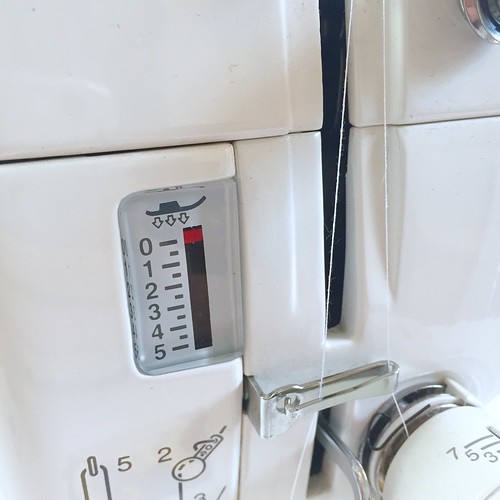
I did a test run on the plastic and it sewed like a charm. I used Aurifil cotton thread (because I love it and it’s always threaded in my machine) and I put my stitch length somewhere between a basting length and a piecing length. Everyone’s machine is different, so kinda in the middle but more towards a baste length.
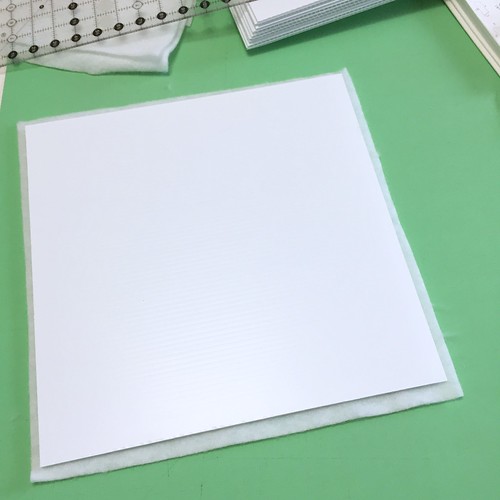
With the smooth side of the batting towards my worktable, and bumpier side towards the plastic, I centered the plastic on top of the batting.
It is important to stitch on top of the plastic so that your sewing machine’s feed-dogs have something to grab on to (ie, grab the batting). Stitch about 1/4″ (or less if you’re comfortable) from the edge.
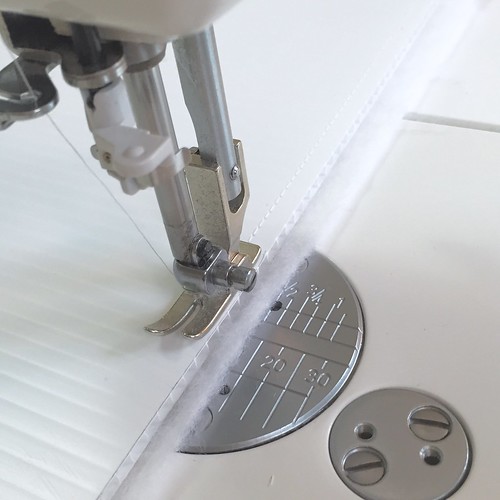
At each corner, be sure to back-stitch to lock your stitching. You do not need to cut your threads at each end, just pivot 1/4 turn to start the next side.
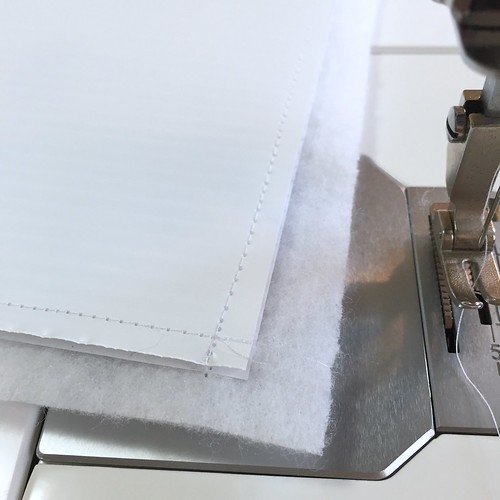
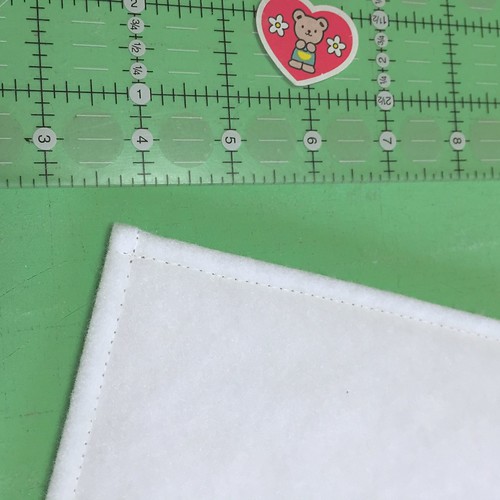
Trim the excess batting from your plastic board.

Flip your board over and admire your work. High five yourself.
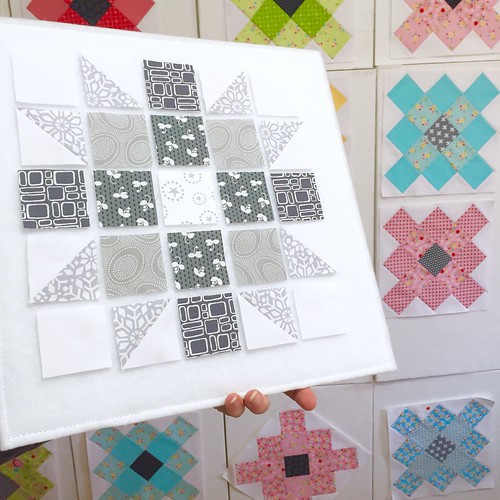
Give it a go - try out your new board buddy and build a block on it. Pretty cool, eh.
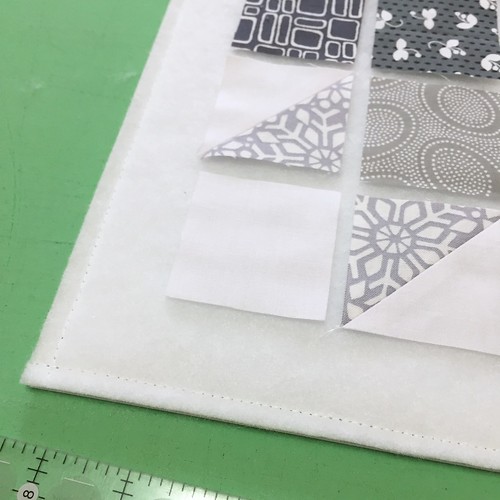
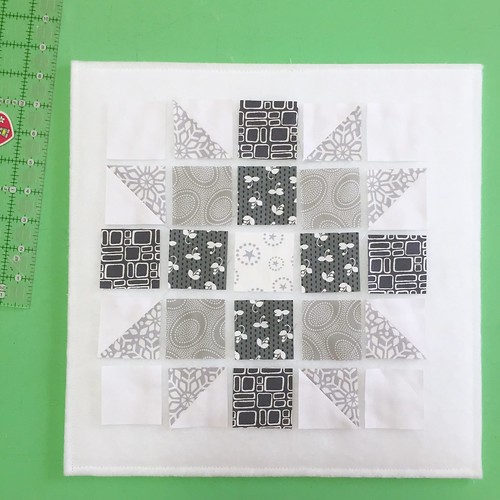
Do a vertical test. What? Yup. Awesome. And you can even stack your board on top of other boards that have block pieces on them. The plastic backside no-likey the fabric pieces on the stacked board below it and doesn’t want to stick to them.
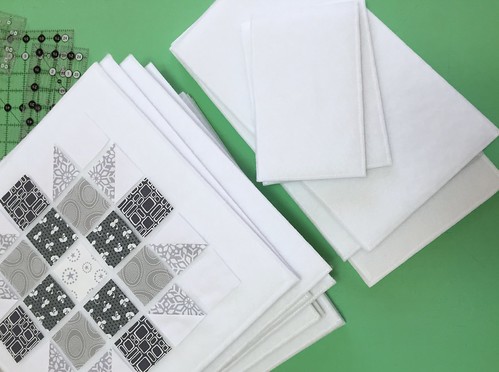
With your leftover pieces you can make mini Block Buddies. It’s also a good way to use up some batting scraps. I did try cotton batting scraps (Warm & White is what I use for quilting), but I particularly like the Soft & Bright poly for this project as it’s not too stretchy, has a low loft, and the poly makes for a nice stick. It’s just perfect.
Click here to my Instagram for comments/to comment.
Posted in Make Something |
 Farting around with needle & thread and then blogging about it.